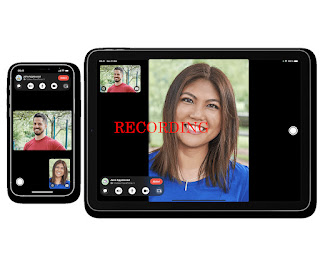
Want to save some memories to remember later when FaceTiming with someone from your iPhone or iPad? FaceTime lets you communicate with family and friends via video or audio calls. FaceTime is only available to Apple users so you must have an iPhone, iPad, or Mac to use FaceTime.
If you want to capture some moments then no third party apps need to be installed. Apple has a screen recording feature available on their iPhone and iPad devices. With a few quick instructions, you'll be able to record FaceTime calls on your iPhone and iPad.
Please Note: Recording video calls/chats and phone calls may not be legal in some countries or regions. You should check the laws of your area before continuing with recording. It is also important and polite that you seek participant consent before recording a call.
Steps to Record FaceTime Calls on iPhone and iPad
The steps to record a FaceTime call are the same for iPhone and iPad. Before you can actually screen-record a FaceTime call, you'll need to make sure that the feature is enabled on the device you're using.
Here is how you can enable screen recording:
1. Open Settings on your iPhone or iPad.
2. Scroll down to find Control Center and tap on it.
3. Next tap on Customize Controls.
4. Scroll to find Screen Recording under More Controls and then tap the + icon. Doing this will add the screen recorder to your device's Control Center under the Include section which is just above the Other Controls section.
This will enable the screen recording feature.
Record FaceTime Calls:
1. Open the FaceTime app on your device.
2. Tap the person you want to call on FaceTime.
3. When the call starts, ask the participants for permission whether or not they agree with you recording the call. Once you get their permission, you can continue recording.
4. Swipe down to access Control Center and tap the Screen Recording icon.
5. Once you enable the screen recording feature, recording will start after three seconds. Exit Control Center and continue your call.
6. You will be able to see that the FaceTime call is being recorded. You will be able to see a small recording icon in the upper left corner of the screen.
7. When you want to stop recording, tap this icon. You will be asked to Stop – confirm your action by tapping on it. This will end the screen recording.
FaceTime calls you record will be available in the stock Photos app on your iPhone or iPad, no matter what you're using.
Remember, recording a FaceTime call will only record video, not audio. This may be because Apple must follow wiretapping rules and regulations and copyright laws in all countries/states/regions. If you want to record audio, you can simply long-press the record icon present in the Control Center. Even recording audio calls is illegal in some areas unless you have official permission.
Mac owners can also record calls in FaceTime. You must obtain consent from the participant before proceeding with call recording – audio or video.
Follow the step-by-step instructions above to be able to record FaceTime calls on your iPad and iPhone.


